Easy Ciabatta Bread Recipe
This post may contain affiliate links. Read our disclosure policy.
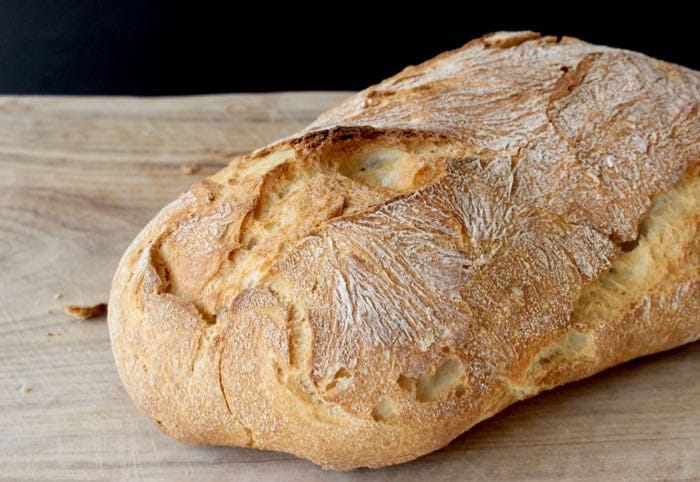
Easy ciabatta bread recipe or Italian “ slipper bread ”. Authentic, homemade from scratch, vegan and perfect to dunk in a hearty bowl of soup.
what is ciabatta bread ?
Originally from the Veneto area, ciabatta is a rustic Italian bread made with an overnight starter and cooked just like a pizza on a preheated pizza stone or in a wood fired pizza oven. Invented by Francesco Favaron in 1982, it is the perfect bread for sandwiches a.k.a panini, bruschetta or just to dip in your favorite sauces.
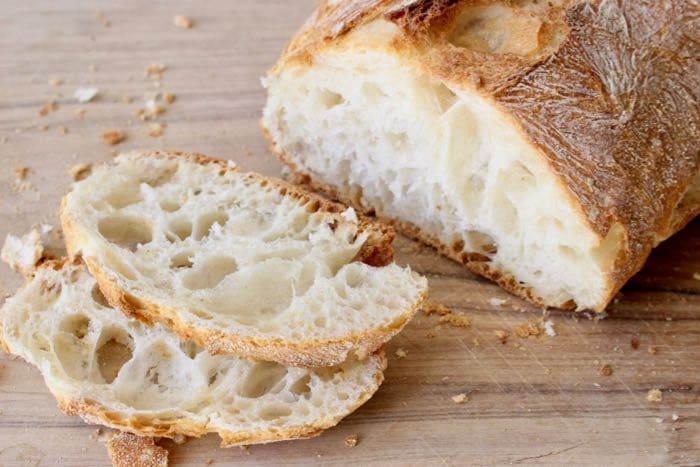
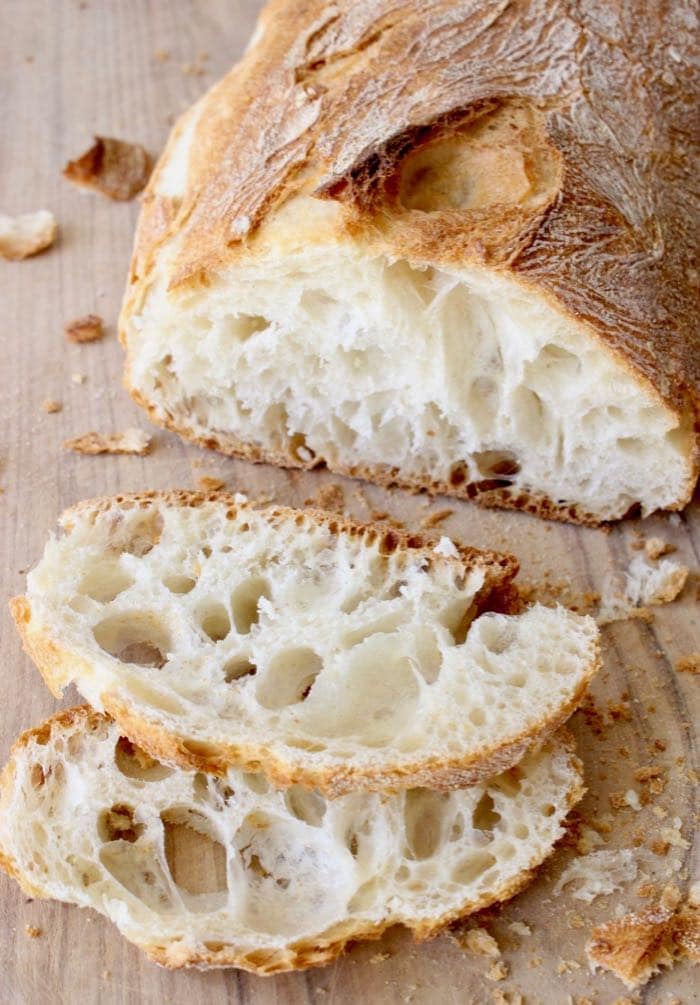
Very easy to make at home using a mixer, but you will need to plan in advance for the starter or Biga. Don’t be intimated, this is a sticky wet dough hence those nice holes, so just roll with it, the mixer will do all the work for you. Don’t be tempted to add extra flour, trust the process and all will be well!
Are there eggs & dairy in ciabatta bread ?
Egg and dairy free, ciabatta is a vegan bread made with water, flour and yeast.
what do you use ciabatta bread for ?
make sandwiches / panini
for bruschetta & crostini
garlic bread
top with pesto, tomatoes & olives
use in stuffing
enjoy fresh.
how to make easy ciabatta bread recipe from scratch:
Step 1: Prepare the “ biga “or sponge at least 12 hours in advance and up to 24 hours.
Step 2: Make the ciabatta dough in the mixer.
Step 3: Let the dough rise.
Step 4: Form 2 long loaves and allow to rise again a second time.
Step 5: Bake the bread.
P.S. As always if you make this recipe please come back here to rate, snap a photo and tag me with #VeggieSociety on Instagram, I love seeing what you make. ~ Florentina Xo’s
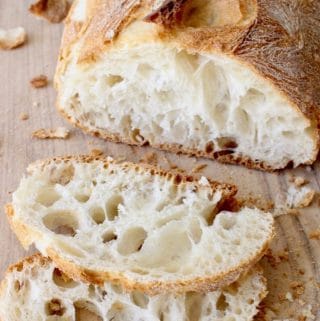
Easy Ciabatta Bread
Easy ciabatta bread recipe or Italian “ slipper bread ”. Authentic, homemade from scratch, vegan and perfect to dunk in a hearty bowl of soup.
Print Recipe
Ingredients
For the Bread:
- 2 cups organic bread flour
- 1/2 tsp dry active yeast
- 1.5 tsp sea salt
- 11 tbsp filtered water
- 1 tbsp extra virgin olive oil
- 2 tbsp warm cashew milk (or water)
For the Starter / Biga:
- 1 cup organic bread flour
- 1/3 cup filtered water, at room temperature
- 1/8 tsp active dry yeast
- 2 tbsp warm water
Instructions
Make the Starter:
- Make your starter the night before you plan to bake the bread (this can be made up to 24 hours in advance).Mix together the yeast with 2 tablespoons of warm water. Allow it to stand for a few minutes. In a medium size mixing bowl stir together the yeast mixture with the flour and the water until combined. Cover with plastic wrap and allow it to sit at room temperature overnight. If preparing it in the morning then let it sit until evening and up to 24 hours.
Make the Ciabatta Bread:
- Use your stand mixer and combine the yeast and the warm milk. Let it sit for a few minutes until creamy. Add the starter, olive oil, flour, sea salt and water and mix together for about 10 minutes until everything is incorporated.
- Prepare a large bowl lightly oiled with olive oil. Transfer the bread dough to it and cover with plastic wrap. Allow it to sit until doubled in size, up to 2 hours.
- Turn the bread dough onto a well floured surface and with floured hands cut it in half. Form 2 long loaves shaping carefully from the sides, do your best not to press the dough from the top so it doesn’t deflate. This is crucial to get a light and airy loaf with lots of irregular holes.(Optional: Use a sharp knife to cut a shallow slit lengthwise in the top of the loaf)
- Transfer the loaves to a parchment lined baking sheet, pizza peel, or a piece of cardboard. Lightly dampen a tea towel and cover the loaves. Allow them to rise again until doubled in size, up to 2 hours.
- Meanwhile preheat your oven to 425” F with a pizza stone in the center for one hour before planning to bake the bread.
- Transfer one of the loaves (with the parchment paper) to the preheated pizza stone and spray lightly with water. Bake for about 25 minutes until golden brown to your liking. Transfer to a wire rack and allow to cool completely before slicing it with a serrated knife.
Notes
- To get a crusty loaf make sure to use a pizza stone and also create some extra steam by placing a dish filled with water on the bottom of the oven as it heats up. Add more water if needed before baking the bread. Allow the loaves to cool inside the oven after baking with the oven door slightly open.
- To obtain the ultimate crusty ciabatta loaf a wood fired pizza oven is the best way to bake it.
Nutrition
Calories: 744kcal | Carbohydrates: 136g | Protein: 22g | Fat: 10g | Saturated Fat: 1g | Sodium: 1765mg | Potassium: 187mg | Fiber: 4g | Calcium: 28mg | Iron: 1.7mg
Servings: 2 loaves
Calories: 744kcal
You’ll Also Love:




This bread looks so amazing! I can’t have any oil, butter, etc. due to a medical condition. Is there a replacement? I have to keep everything very low fat.
Thank you,
M. N.
Loved this bread, it is a sticky dough to work with and my crust wasn’t quite as crispy and nice but we gobbled it up right away, no regrets and will make it again soon.
I want to make this bread but I am wondering about the carb count. It says Carbohydrates: 136g, is that per slice? Or for the entire loaf? I am not sure how to count this in my diet. Thanks Gail
The recipe makes 2 loaves so the carb count would be per loaf. I hope that makes sense.
Hi, will I get same result if I don’t have a pizza stone?
You could use a cast iron skillet preheated with the oven instead.
I don’t have a stand mixer. Do I just knead by hand?
Yes!
I’m in mid-bake and all is looking good. One request…I’d really like to be able to read a recipe without ads popping up and the page refreshing constantly.
Can I substitute almond milk for that cashew milk?
Sure you can, I like cashew milk because of its fat content but plain almond milk should work just fine, even coconut milk!
Is this supposed to be very soupy in process? Mine did not form very well
Yes, it’s a very wet dough.
Mine looks good on the outside, and has a great crust. The inside, however, has a very even crumb — no big bubbles. I’m wondering about the part where It’s covered with a damp towel. While I used the lightest flour sack-type towel I have, I’m wondering if that both kept it down and cooler than it would have been during the second rise. (It was very light and airy after the first rise, and handled very gently.) It made an excellent “country white” bread with a great crust and good flavor — just lacked the “holey” inside. I’ll definitely try again! Thanks!
Can it be frozen before or after baking ?
I would freeze after baking and cooling off completely.
We are at the stage of adding the starter to the rest of the ingredients but we are having a very dry go of things. Other comments say it’s kinda wet.. should I just add a little milk or water?
Yes I would add a little extra liquid, it’s meant to be a wet dough. Good luck!
Can I sub instant yeast for active dry in the Biga? If so should I reduce by a 1/4?
The ratio should be roughly 2:1
Specific amount yeast dry or instant yeast to use
Can I use all purpose flour instead of bread flour??
sure!
I realize this is a vegan recipe, however I have fat free cows milk in my kitchen…if that ok to substitute for the cashew milk?
Thank you.
Fatty cashew or coconut milk work best here, you can use what you have this time so nothing goes to waste. Report back!
I’m not sure what I did but my bread was a fail. The starter raised but the bread itself never raised in either step. It cooked very thin, but the inside looks great and it tastes delicious!
Hi! I have a sourdough starter in my fridge. Can I use that instead of the biga?
That should work just fine!
Hi,
How long can you keep the dough. Which will give the best rbread. Is it better to cook 2 loaves and freeze one or keep half the dough and cook a second loaf a day or so later.
Thanks
Dennis
I prefer to bake both loaves and freeze one for later.
I don’t have a pizza stone. Can I use an upside down baking sheet?
yes you can!
Mine turned out dense
Did you mishandle the dough? Doing this will allow the air & gasses to escape which form the nice pockets in the finished product.
Can you cook both loaves at the same time? If not, how do you store the second loaf while waiting to restart the process.
Yes, both loaves can be cooked at the same time.
Its superb. came our just like your pic.. good tip to not press the dough on top..
I have a convection oven. Should I use convection or regular bake.
I used regular bake but I’m sure convection is fine!
Instead of two loaves, could I put them together to make one large Boule ?
You sure could but you’ll have to tinker a bit with the baking time i suppose, so keep an eye on it and adjust accordingly.
Can I use non organic flour to make the starter?
Sure!
This bread recipe is wonderful, I would like to be able to make a bunch for family for Christmas. If freezing how long will it hold and how would you recommend hearing it up to be ready to eat (using the oven) thanks!!
You can reheat a frozen loaf @375″F for 12 to 15 minutes until the crust is crispy golden.
Hi – this was a hit with the family! I am oil-free what do you recommend to substitute the oil?
Abby, just omit the oil or add a little apple sauce instead, I’d just leave it out.
Excellent bread made a double batch and got a large loaf and 8 sandwich rolls.A bit of work so you have to plan a bit but well worth it,thank you for sharing the recipe.
Making the started this afternoon. In the recipe, you state to remove bread to cooling rack. Then in the notes you have to leave in oven with door ajar to cool. Which is correct??
Both methods are correct Kevin, whichever you prefer 🙂
Can you add garlic to give it some added flavor for this bread?
You could add garlic powder maybe 1 tsp or so but I would not add fresh garlic. Enjoy!
Do you use a dough hook with the standing mixer? Or the paddle? And what speed for 10 minutes?
Once the ingredients are combined just use the dough hook on low to medium speed.
Thank you!
Can gluten free flour be used? Thank you.
No this recipe has not been adapted for gluten free flour.
The loaves came out ok. May of turned out better with bread flour, I only had all purpose flour. I would make again, increase the salt a bit. The crumb was acceptable, not dense.
I took pic but seems I can’t get on here.
I misread the recipe and didn’t wait eleven hours before adding the other ingredients and mixing to rise. I think it was around 8ish hours I let it sit overnight. Will it still be ok?
That should be OK!